

Recently I've been working on a little .NET 6 side-project. I wanted to host it on Azure App Service. Having finished my MVP, it was deployment time.
To make my life easier, I decided to automate the deployments. Of course, I could create a batch script running the dotnet publish /p:PublishProfile=... command. But being dependent on the .pubxml files is not ideal. Some of you may ask why - well, I wanted to find a portable option that could be used with different CI/CD systems and workflows. Unfortunately, not all CI/CD platforms support setting files as variables and marking them as secret and not everybody uses Visual Studio.
My first thought was naturally Azure CLI - it supports authentication using Azure AD's Service Principal, whose permissions can be as restrictive as possible. Apparently, my hunch was correct as a few minutes later, I wandered upon the az webapp deploy command.
It looked exactly like what I needed. After testing it out - it mostly worked as expected.
Create Azure Service Principal
The first step is creating a Service Principal. It essentially is an Azure account that can be used to access your Azure resources in applications, hosted services or automated tools. You can restrict the identity's access to just the resources it needs by assigning specific roles.
To create a Service Principal, you must fulfil two requirements:
- Have
Microsoft.Authorization/*/Writepermission on the subscription (or specific resources) you want to access through the service identity - Be able to create app registrations in the associated Azure AD (either by being an administrator or having your administrator allow registering apps by regular users)
If you're missing any of the above, ask your Azure administrator to assign you the proper roles or create the Service Principal with access to the resources you need. You check your level of permissions using Azure Portal:
The step-by-step guide for creating a Service Principal provided by Microsoft is well-written and easy to understand: Register an application with Azure AD and create a service principal.
After following the documentation you should have these three values:
- Client ID:
xxxxxxxx-xxxx-xxxx-xxxx-xxxxxxxxxxxx - Client secret:
xXX0xXxx!xx!!X00x0xX!x000XxXXX!!x00xx000 - Tenant ID:
yyyyyyyy-yyyy-yyyy-yyyy-yyyyyyyyyyyy
If you have those, you can authenticate in Azure CLI using the following command:
az login --service-principal --username <Client ID> --password <Client Secret> --tenant <Tenant ID>So, in this case:
az login --service-principal --username xxxxxxxx-xxxx-xxxx-xxxx-xxxxxxxxxxxx --password xXX0xXxx!xx!!X00x0xX!x000XxXXX!!x00xx000 --tenant yyyyyyyy-yyyy-yyyy-yyyy-yyyyyyyyyyyyAfter successful login, the Azure CLI will print out the subscription details:
[
  {
    "cloudName": "AzureCloud",
    "homeTenantId": "yyyyyyyy-yyyy-yyyy-yyyy-yyyyyyyyyyyy",
    "id": "zzzzzzzz-zzzz-zzzz-zzzz-zzzzzzzzzzzz",
    "isDefault": true,
    "managedByTenants": [],
    "name": "Default subscription",
    "state": "Enabled",
    "tenantId": "yyyyyyyy-yyyy-yyyy-yyyy-yyyyyyyyyyyy",
    "user": {
      "name": "xxxxxxxx-xxxx-xxxx-xxxx-xxxxxxxxxxxx",
      "type": "servicePrincipal"
    }
  }
]
The guide linked above shows how to give the Service Principal access to the whole Azure subscription. It only needs access to the specific Azure App Service that will be deployed.
Deploy .NET application
We're almost there! Now we need to deploy the application. The first step is to create a publishable artifact from our .NET project.
For the following steps, this is the assumed project directory structure:
MyApp/
├── src/
│   ├── Api/
│   │   ├── Infrastructure
│   │   ├── Controllers
│   │   ├── Api.csproj
│   │   ├── appsettings.json
│   │   ├── Program.cs
│   │   └── Startup.cs
│   ├── Logic/
│   │   ├── Services
│   │   └── Logic.csproj
│   └── Data/
│       ├── Models
│       ├── DbContext
│       └── Data.csproj
└── MyApp.sln
Let's also presume the shell of choice is running in the MyApp directory, and Azure CLI is logged in using the Service Principal created earlier.
First things first - Nuget package restore. This one is simple:
dotnet restore src/Api/Api.csproj --packages .nuget/ --runtime win-x86I'm specifying the --packages parameter so that the downloaded packages can be cached. I also define the runtime I'll have the app running in. Since my Azure App Service is based on a 32-bit Windows machine, I choose win-x86. For more information about Runtime ID, check the .NET RID Catalog.
Here is the complete reference for the dotnet restore command for the curious 🤓.
After restoring the packages, we can build and publish the project:
dotnet publish src/Api/Api.csproj -c Release --no-restore --runtime win-x86 --no-self-contained -o ./tmp/publishThis command builds the specified project (Api.csproj in this case) in Release configuration (-c Release) for a 32-bit Windows machine (--runtime win-x86) with .NET installed on it (--no-self-contained). Since the required NuGet packages were restored earlier, the --no-restore option is specified to skip doing that again. Then it outputs the built project to MyApp/tmp/publish directory.
Now, let's zip it. The process differs slightly depending on the OS:
# Windows
cd tmp\publish
Compress-Archive . publish.zip

# Linux
cd tmp/publish
zip -r publish.zip .
The last but arguably the most important step is easy:
az webapp deploy --resource-group <Resource Group Name> --name <App Service Name> --src-path publish.zip --type zipAnd that's it! The upload and deployment may take a while, but the app should be running as expected after that. If you're interested in the complete documentation of az webapp deploy, visit Microsoft's documentation at the link.
Other options
Now, there are a few other options to deploy a .NET application to Azure App Service using the command line.
Run from package
This is a very similar approach to the one presented above. The difference is that the application files are not extracted into App Service's filesystem, but the archive is mounted as a read-only wwwroot directory. The solution has both advantages as well as limitations. To read about both, visit Run your app in Azure App Service directly from a ZIP package.
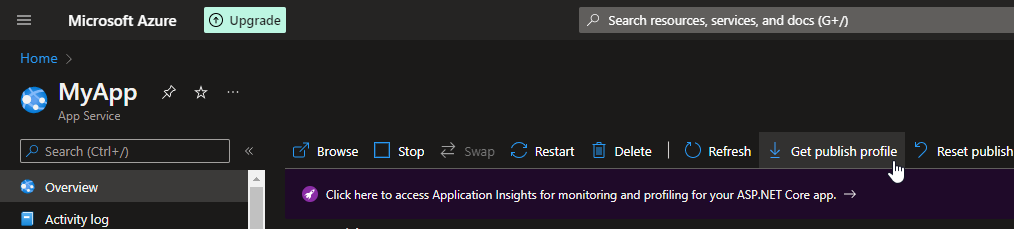
Publish profile
The other option was mentioned earlier - it is using the dotnet publish command with a Publish Profile provided using the /p:PublishProfile (or /p:PublishProfileFullPath) and /p:Password parameters. There is one major problem with this approach. Even though there is a button in Azure Portal that spells Get publish profile, this is not the one that's required.
The one that's needed can only be generated using Visual Studio. As a huge JetBrains Rider fan, this hurts me deeply.
Docker container
Another option is to deploy the application as a Docker image and have Azure run it from a container. There is a very detailed guide on MSDN at Tutorial: Deploy an ASP.NET Core and Azure SQL Database app to Azure App Service.
It's important to choose the option that works best for your project and workflow. The Azure CLI was the best for my use case, but I can see all of these options being adequate for other projects.